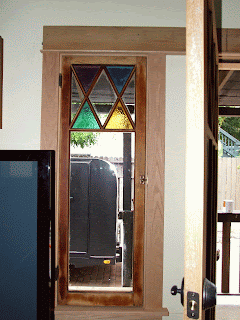
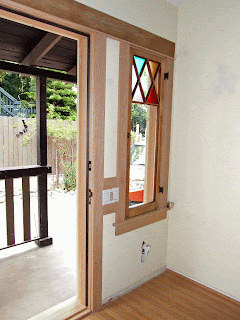
Before
After
A friend of mine with a little 1930s Tudor house in Hemet,
CA gave me the phone number of a guy he used to put in a new (old) back door at
his house. Jeff came highly recommended
to do a great job hanging doors and installing old mortise locks – just the
things we needed for our front door project.
When Jeff came out to take a look at the job, he was really enthusiastic
and said he really wanted to work on our project and it would probably take
about 2 days to get the crappy old door and sidelights out and the new salvaged
door and sidelights in. My husband David
and I had already built the jambs, but something went horribly wrong with the
door jamb somewhere in the last two years as it sat gathering dust in the
garage and by the time Jeff started the project, it didn’t fit and he had to
build a new one. Maybe it was the flood,
or perhaps incorrect measurements, we’re blaming it on the flood.
Working on the door a couple of years ago
Anyway, Jeff got started and the first thing he did was demo
the old door and sidelights and then he started doing whatever it was he
did. I don’t know because I was at
work. David was at home herding cats
because we just got a new kitten and our cat Pandora hates the cute little baby
kitty, so keeping the cats in separate places is a must.
And that’s kind of tough with a big gaping
hole in the living room where your front door used to be. So mid-week Jeff is grumbling about working
on old houses and the words “can of worms” were used as I recall, but things
started coming together and I came home on the fourth day to sidelights, but
still no door. Day five the door was
installed and man oh man, we were excited!
I had stripped the door and sidelights a couple of years ago and put the
colored glass at the top in the diamond panes and to finally get to see the
full effect with the afternoon sunlight was well worth the wait.
So after 7 days (things really do take 3 times as long and
cost 3 times as much!), we had our new old front door and sidelights with
hardware. Yay!

Time for me to get out there and caulk and
prime and paint, which I did all last weekend.
I spent a couple of hours at the Benjamin Moore store working with the
lovely Connie trying to match the original brown of the old stained
shingles. If only someone hadn’t painted
the house yellow! There’s no going back
to the beautiful old stain now. My only
hope was to find a paint color that would look close. Finally Connie tried using Van Buren Brown,
but she left out all of the white which was killing the color and making it too
dull and gray and, voila! Success! A nearly perfect match! I got it in flat, to further attempt to look
more like the original stain. I was so
excited because although we painted over the ugly yellow back in 2000, the
house has always been kind of a chocolate brown house ever since. I love chocolate, but not on my house : - ) Finally,
a nice dark brown that works.


For the trim, I used Brookside Moss (also from Benjamin
Moore) – it is this crazy yellow/green color that is really lively and kind of
quirky/artisty and I absolutely love it.
I paired it with my original sage green color on the sash and door,
Dragonfly Wing (a Home Depot color that I had mixed up at Benjamin Moore
because I like their paint better).
So
the yellow/green and the slightly darker grey/green look great together and pick
up the colors in the front yard, especially the cactus along the driveway – oh
and the color of my cat, Pandora’s eyes : - )
I plan on painting the house the dark brown, original shingle color and
I will also paint the gable fascia and side trim that dark brown and just have
the green combo on the doors and windows and a little bit on the porch. I like that look where the gable and side
trim don’t stand out, especially because my gable is so unremarkable – there’s
no point in calling attention to it – yawn.
Next weekend will be the second coat of paint and hopefully
a start on staining the woodwork on the inside.
Stay tuned …


